A Complete Guide for Fence Repairs
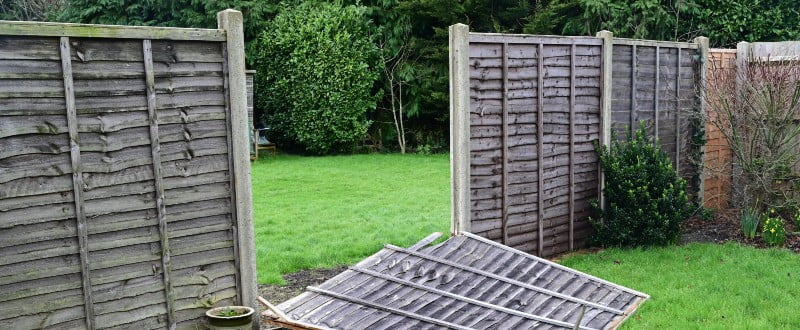
Fences will become damaged overtime due to wear and tear, rot, attack by insects or commonly, due to extreme weather conditions, such as high winds. This guide will hopefully explain in simple steps, how to fix your fence, without having to spend a fortune.
Checking your timber fence regularly to detect signs of damage is important. If there are signs of rot, for example, not acting early as possible can cause long term issues which may lead to the entire fence needing to be replaced. Here are some common areas of damage and how to fix them:
Check panels and timber posts for cracks and splits
Minor cracks and splits can be filled using specialist outdoor wood glue. How to fix: You will need to start with the following tools: wood glue, clamp and sanding paper as well as safety wear.
- Simply clean the area affected, remove any loose debris and fill the split with the glue.
- Clamp the treated wood in place and leave to dry.
- Sanding the area once the clamp is removed will give a smooth finish.
Check panels and timber posts for rot or infestation
If you see signs of rot or infestation, you will need to replace the panel and posts to avoid it spreading to the rest of the fence. How to fix: You will need to start with the following tools: blocks to help lever the post out of the ground, crowbar, hacksaw, claw hammer and digging spade as well as safety wear.
- You will need to separate the panel/s attached to the rotted post. This can be done by levering the crowbar between the panel and post until the nails that join the panel, or the post are out. If the panels are screwed to the post, simply use a screwdriver or drill, depending on the best angle, to remove the screws.
- These protruding nails can either be hammered into the panel or pulled out using pliers or a claw hammer. Repeat this step with the other panel attached to the rotted post.
- Once the panels are detached and the post is accessible to remove, use a shovel to dig out the base of the post as well as the postcrete. If this is proving difficult, cut a v-notch in the post using a saw about 20cm up from where the post meets the ground. Carefully lever the post out of the ground using a demolition bar resting on blocks.
- Ensure there is a minimum of 600mm of ground dug for the new post to be concreted in.
Check if your fence is leaning or unsecure
A common issue, especially following storms, is a wobbly fence. Fence posts can be reinforced rather than replacing the fence post or panel in question. How to fix: You will need to start off with a spur, either concrete or metal, post mix, saw, digging spade, spirit level, hammer, power drill as well as a tin of wood treatment along with the coach bolts or screws and safety wear.
Fixing a concrete or metal spur:
- Using a shovel, dig a hole around the base of the fence post on the side where the concrete or metal (Fencemate) repair spur will go. Again, the minimum depth should be 600mm in the ground. If the post is rotten, saw off the rotten part of the post using a saw.
- Place the spur in the hole and brace to the post.
- If using coach screws, the screw can be put straight through the spur into the post using a socket. If coach bolts are being used, put the bolts through the spur and tap with a hammer to mark where the post. Using a drill, drill the holes where the bolts will sit on the marked spots. Place the spur against the post again, slide the bolts through the spur and the holes in the post and secure using a nut and washer.
- Fill around the spur using post mix. Use a trowel to smooth the concrete surface so the rainwater will drain away from the post.
Check if your fence rail is damaged
If we look at two common fences, featheredge and post and rail fencing, the rails spanning horizontally that secure the fence may become damaged or broken overtime. Again, if left unfixed, there is a chance the rest of the fence will come down.
If fixing an arris rail on a featheredge fence, an arris rail bracket can be used to secure a new rail in place. An arris rail bracket is a length of galvanised steel specially shaped to fit an arris rail using pre-drilled holes. How to fix: You will need to start off with the required number of arris rail brackets, wood screws, spirit level and a power drill, as well as safety wear.
- Support the post and the arris rail.
- Place the arris rail bracket into position ensuring it is level with the fence. A spirit level may be useful here.
- Secure the bracket using your screws. No pilot holes are necessary.
If a rail has been split on your post and rail fence, it is important to replace, especially if the fence is securing in livestock. How to fix: You will need to start off with the required number of rails, screws to secure the rail back in place, a drill as well as safety wear.
- Unscrew the damaged or broken rail.
- Secure the new rail in place, ensuring it lines up with the existing rails and screw into place.
The above shows how you can fix your fence without having to fork out for a new fence. However, it is essential to maintain your fence on a regular basis to prolong the life expectancy as much as possible. We have added a few steps and tips to prolong below.
Pressure treated timber will protect your timber against rot and decay as well as insect infestation. We advise to always purchase pressure treated timber to prolong the life of your fence.
Treating timber regularly using a wood preserver will also prolong the life of your fence. Depending on the ground contact as well as the exposure to sunlight will depend on how often your fence will need treating. It is recommended to treat your fence every 2 years with a wood preserver. However, if you have chosen to paint your fence, this might need re-coating every 12-18months.


